on
OpenCV & Ceres Solver
A Journey to Install OpenCV & Ceres Solver on Windows
CUDA with cuDNN
Please refer to other materials regarding CUDA installation.
After installation, add the environment variable below to the system environment variables.
- [Variable name] CUDA_PATH_V11_6
-
[Variable value] C:\Program Files\NVIDIA GPU Computing Toolkit\CUDA\v11.6
- [Variable name] CUDA_PATH
- [Variable value] %CUDA_PATH_V11_6%
Visual Studio (MSVC)
Please refer to other resources regarding MSVC installation.
CMake
- Download cmake-3.23.1-windows-x86_64.msi file from https://cmake.org.
- Run it as an administrator.
Eigen3
Eigen3 is a header only library, there is no need to build/install Eigen3 to use it if you include it manually. So you don’t need to add any path related to it in MSVC’s “Additional Libraries Directory”. Just add the path that includes its header files to MSVC’s “Additional Include Directories”. However, we should to build and install it so that other 3rd party libraries that will be installed later know the existence of Eigen3.
-
Download eigen-3.4.0.zip file from GitHub.
-
Unzip it to “C:\tmp\eigen-3.4.0”.
- In CMake-gui:
- Specify the directory where the source code is located. We’ll refer to it as {source}.
- Specify the directory where the binary will be created. We’ll refer to it as {build} = {source}\build.
- Click “Configure” button.
- Visual Studio 17 2022
- Use default native compilers
-
Specify the appropriate options. Please refer to the captured PNG file for details.
-
Click “Generate” button, then you can find Eigen3Config.cmake file in {build} directory.
-
Click “Open Project” button.
-
Build “INSTALL” project inside MSVC.
-
You can see that the files are created in “C:\tmp\built”. (Here, “unsupported” directory means the codes that is no longer supported because development has stopped.)
- Copy:
- “C:\tmp\built\include\eigen3\Eigen” directory ➜ “$(DIBLAT_PATH)\extern\include\Eigen”.
- Open DisableStupidWarnings.h and replace all occurrences of “diag_suppress” with “nv_diag_suppress”.
zlib
-
Download zlib1213.zip file from GitHub.
-
Unzip it to “C:\tmp\Imath-main”.
- In CMake-gui:
- Specify the directory where the source code is located. We’ll refer to it as {source}.
- Specify the directory where the binary will be created. We’ll refer to it as {build} = {source}\build.
- Click “Configure” button.
- Visual Studio 17 2022
- Use default native compilers
-
Specify the appropriate options. Please refer to the captured PNG file for details.
-
Click “Generate” button, then you can find Eigen3Config.cmake file in {build} directory.
-
Click “Open Project” button.
-
Build “INSTALL” project inside MSVC.
-
You can see that the files are created in “C:\tmp\built”.
- Copy:
- “C:\tmp\built\include\zlib” directory ➜ “$(DIBLAT_PATH)\extern\include\zlib”
- “C:\tmp\built\lib*.lib” files ➜ “$(DIBLAT_PATH)\extern\lib”.
- “C:\tmp\built\bin*.dll” files ➜ “$(DIBLAT_PATH)\extern\bin”.
- “C:\tmp\built\bin\Release*.exe” files ➜ “$(DIBLAT_PATH)\extern\bin”.
Imath
-
Download Imath-main.zip file from GitHub.
-
Unzip it to “C:\tmp\zlib-1.2.13”.
- In CMake-gui:
- Specify the directory where the source code is located. We’ll refer to it as {source}.
- Specify the directory where the binary will be created. We’ll refer to it as {build} = {source}\build.
- Click “Configure” button.
- Visual Studio 17 2022
- Use default native compilers
-
Specify the appropriate options. Please refer to the captured PNG file for details.
-
Click “Generate” button, then you can find Eigen3Config.cmake file in {build} directory.
-
Click “Open Project” button.
-
Build “INSTALL” project inside MSVC.
-
You can see that the files are created in “C:\tmp\built”.
- Copy:
- “C:\tmp\built\include\Imath” directory ➜ “$(DIBLAT_PATH)\extern\include\Imath”
- “C:\tmp\built\lib*.lib” files ➜ “$(DIBLAT_PATH)\extern\lib”.
- “C:\tmp\built\bin*.dll” files ➜ “$(DIBLAT_PATH)\extern\bin”.
OpenEXR
The math library used by OpenEXR has been changed from IlmBase to Imath. To specify this, you must use cmake in the Command Prompt instead of CMake-gui.
-
Download openexr-main.zip file from GitHub.
-
Unzip it to “C:\tmp\openexr-main”.
- In the the Command Prompt:
- cd C:\tmp\openexr-main
- mkdir build
- cd build
- cmake -G”Visual Studio 17 2022” -A x64 -DCMAKE_BUILD_TYPE=Release -DCMAKE_INSTALL_PREFIX=C:\tmp\built -DZLIB_ROOT=C:\tmp\built\include\zlib -DILMBASE_PACKAGE_PREFIX=C:\tmp\built ..
- cmake –build . –config Release
- cmake –install .
- Copy:
- “C:\tmp\built\include\OpenEXR” ➜ “$(DIBLAT_PATH)\extern\include\OpenEXR”
- “C:\tmp\built\lib*.lib” files ➜ “$(DIBLAT_PATH)\extern\lib”.
- “C:\tmp\built\bin*.dll” files ➜ “$(DIBLAT_PATH)\extern\bin”.
- “C:\tmp\built\bin*.exe” files ➜ “$(DIBLAT_PATH)\extern\bin”.
NASM
- Download nasm-2.15.05-installer-x64.exe file from https://www.nasm.us.
- Run it as an administrator.
- After installation, add the following path to the Path environment variable.
- C:\Program Files\NASM (The path where nasm.exe exists)
OpenCV
-
Download opencv-4.x.zip file from GitHub.
-
Unzip it to “C:\tmp\opencv-4.x”.
-
Download opencv_contrib-4.x.zip file from GitHub and unzip it to “C:\tmp\opencv_contrib-4.x”.
- In CMake-gui:
- Specify the directory where the source code is located. We’ll refer to it as {source}.
- Specify the directory where the binary will be created. We’ll refer to it as {build} = {source}\build.
- Click “Configure” button.
- Visual Studio 17 2022
- Use default native compilers
-
Specify the appropriate options. Please refer to the captured PNG file for details.
-
Click “Generate” button.
-
Click “Open Project” button.
-
Build “OpenCV” solution inside MSVC.
-
You can see that the files are created in “C:\tmp\built”.
- Copy:
- “C:\tmp\built\include\opencv2” directory ➜ “$(DIBLAT_PATH)\extern\include\opencv2”
- “C:\tmp\built\x64\vc17\lib*.lib” files ➜ “$(DIBLAT_PATH)\extern\lib”.
- “C:\tmp\built\x64\vc17\bin*.dll” files ➜ “$(DIBLAT_PATH)\extern\bin”.
- “C:\tmp\built\x64\vc17\bin*.exe” files ➜ “$(DIBLAT_PATH)\extern\bin”.
gflags (formerly Google Commandline Flags)
-
Download gflags-master.zip file from GitHub.
-
Unzip it to “C:\tmp\gflags-master”.
- In CMake-gui:
- Specify the directory where the source code is located. We’ll refer to it as {source}.
- Specify the directory where the binary will be created. We’ll refer to it as {build} = {source}\mybuild. (due to “BUILD” file already exists.)
- Click “Configure” button.
- Visual Studio 17 2022
- Use default native compilers
-
Specify the appropriate options. Please refer to the captured PNG file for details.
-
Click “Generate” button.
-
Click “Open Project” button.
-
Build “INSTALL” project in release mode inside MSVC.
-
You can see that the files are created in “C:\tmp\built”.
- Copy:
- “C:\tmp\built\include\gflags” directory ➜ “$(DIBLAT_PATH)\extern\include\gflags”
- “C:\tmp\built\lib*.lib” files ➜ “$(DIBLAT_PATH)\extern\lib”
- “C:\tmp\built\bin*.dll” files ➜ “$(DIBLAT_PATH)\extern\bin”
glog (Google Logging Library)
-
Download glog-master.zip file from GitHub.
-
Unzip it to “C:\tmp\glog-master”.
- In CMake-gui:
- Specify the directory where the source code is located. We’ll refer to it as {source}.
- Specify the directory where the binary will be created. We’ll refer to it as {build} = {source}\build.
- Click “Configure” button.
- Visual Studio 17 2022
- Use default native compilers
-
Specify the appropriate options. Please refer to the captured PNG file for details.
-
Click “Generate” button.
-
Click “Open Project” button.
-
Build “INSTALL” project in release mode inside MSVC.
-
You can see that the files are created in “C:\tmp\built”.
- Copy:
- “C:\tmp\built\include\glog” directory ➜ “$(DIBLAT_PATH)\extern\include\glog”
- “C:\tmp\built\lib*.lib” files ➜ “$(DIBLAT_PATH)\extern\lib”
- “C:\tmp\built\bin*.dll” files ➜ “$(DIBLAT_PATH)\extern\bin”
SuiteSparse
-
Download suitesparse-metis-for-windows-master.zip file from GitHub.
-
Unzip it to “C:\tmp\suitesparse-metis-for-windows-master”.
- In CMake-gui:
- Specify the directory where the source code is located. We’ll refer to it as {source}.
- Specify the directory where the binary will be created. We’ll refer to it as {build} = {source}\build.
- Click “Configure” button.
- Visual Studio 17 2022
- Use default native compilers
-
Specify the appropriate options. Please refer to the captured PNG file for details.
-
Click “Generate” button.
-
Click “Open Project” button.
-
Build “INSTALL” project in release mode inside MSVC.
-
You can see that the files are created in “C:\tmp\built”.
- Copy:
- “C:\tmp\built\include\suitesparse” directory ➜ “$(DIBLAT_PATH)\extern\include\suitesparse”
- “C:\tmp\built\lib*.lib” files ➜ “$(DIBLAT_PATH)\extern\lib”
- “C:\tmp\built\bin*.dll” files ➜ “$(DIBLAT_PATH)\extern\bin”
Ceres Solver
CMake-gui does not find the already installed CXSparse and SuiteSparse. So I’ll use the Command Prompt.
-
Download ceres-solver-2.1.0.tar.gz file from https://ceres-solver.googlesource.com/ceres-solver.
-
Unzip it by “tar xvfz ceres-solver-2.1.0.tar.gz” in the Prompt Command.
-
Move the create directory to “C:\tmp\ceres-solver-2.1.0”.
- In the the Command Prompt:
- cd C:\tmp\ceres-solver-2.1.0
- mkdir mybuild (due to “BUILD” file already exists.)
- cd mybuild
- cmake ..
- cmake –build . –config Release
- cmake –install .
- Copy:
- “C:\tmp\built\include\ceres” directory ➜ “$(DIBLAT_PATH)\extern\include\ceres”
- “C:\tmp\built\lib*.lib” files ➜ “$(DIBLAT_PATH)\extern\lib”
- “C:\tmp\built\bin*.dll” files ➜ “$(DIBLAT_PATH)\extern\bin”
If some errors occur while building your source code by linking the Ceres library as shown below, change “SDL checks” to “No(/sdl-)”.
- C4996 ‘ceres::GradientProblem::parameterization_’
- C4996 ‘ceres::LocalParameterization’: LocalParameterizations will be removed from the Ceres Solver API in version 2.2.0. Use Manifolds instead.
- C4996 ‘j0’: The POSIX name for this item is deprecated. Instead, use the ISO C and C++ conformant name: _j0. See online help for details.
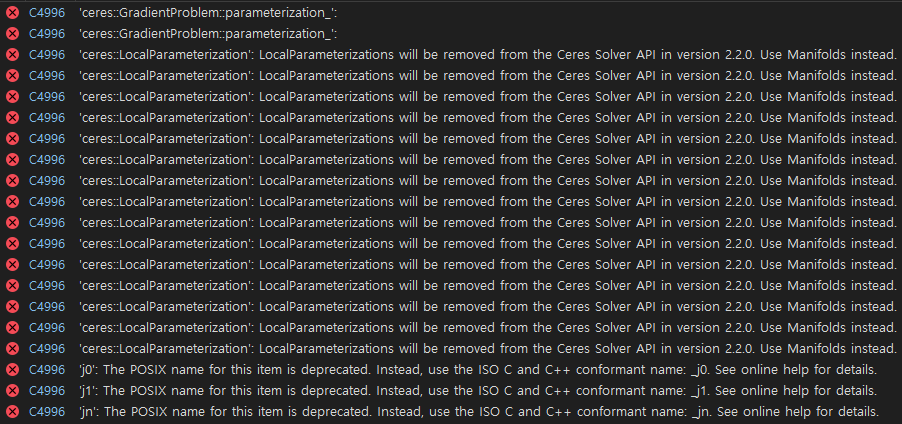

SDL check is a setting to improve program security. When SDL is set, only functions with enhanced security can be used. If functions that can cause security problems are used, they are treated as errors, not warnings, and compilation stops. For example, when using SDL, scanf_s should be used instead of scanf.